Tuesday, June 23, 2020

2020 Top 5 VOB to DVD Burner

Many people may need to burn their movies to DVD disc for safekeeping or convenient sharing and playback. However, not all people succeeded in doing this. To burn VOB files to DVD disc, you need to at first get to know the detailed information about DVD structure. Also, you need a proper tool to help you do so. In this post, we would like to share effective and useful VOB to DVD converter programs to help you burn VOB to DVD in clicks.

Part 1: Top 5 Free VOB to DVD Burner

1. CDBurner XP
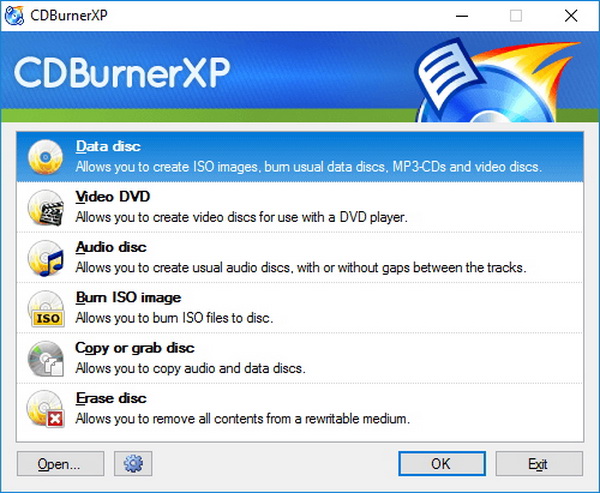
This freeware is mostly designed for only Windows users. There are several versions for Mac OS system as it also works out smoothly on the platform. If you want a fast yet simple method to burn VOB to DVD, you can positively try this one because of its outstanding burning ability, which enables you to quickly add VOB files and burn to DVD disc. There are more uses if you want to create Blu-ray disc, DVDs, CDs and other kinds of data like ISO image files. The special feature about this application is the function of verifying data when you are done with the burning process. And you can also change the using languages by your place. Bulk burning is also supported and it really does a good job of erasing rewriteable media data.

2. ImgBurn
You can find ImgBurn very popular and has received good reviews on many ranking and freeware texting websites and it functions quite well in burning DVD, CD, HD-DVD, as well as Blu-ray discs. The ImgBurn can treat each of those procedures in just such a handy way. Even the interface and all the icons seem to be old-fashioned and not intuitive this would not stop it from being a modern and practical burning software tool with its Unicode. It can support most formats from popular video, image, and audio files for input and output. Its updated version always can catch up with the latest drives. This one offers an image queue system and layer break selection.


3. BurnAware Free
BurnAware is usually used as free software to burn VOB files to DVD. Apart from the VOB files, you can also change the input format to other types like pictures, documents, videos, music, and digital photos. Making bootable discs is also available with this tool and ISO image files are supported. Being able to extract soundtracks, you can also recover or erase data from unreadable discs. Its main features include UDF partition, BOOT settings, verifying data, and session selection. However, you cannot customize the copy via this program.


4. WinX DVD Author
WinX DVD Author is capable of converting VOB videos to DVD discs, as well as other video formats such as YouTube videos, Blu-ray videos, and HD camcorder videos. While having requirements to let your video become more polished, you are allowed to personalize the DVD with titles, chapter menu, captions, DVD menu, background soundtrack, and background images. But at first, you will be highly recommended to save VOB video as a DVD folder and then burning DVD folder to DVD disc will be easier. The burning speed is quite high while the quality can also be guaranteed. And the ratio of 16:9 is seamlessly compatible.


5. Ashampoo Burning Studio Free
Ashampoo Burning Studio provides such a straightforward method for Windows 10 that allows for burning burn VOB to DVD for free. In addition, it takes really good care of every backup task. You can utilize this tool to restore data simply. ISO image file can be extracted and later on converted into a DVD disc.

Part 2: Burn VOB to DVD with Leawo DVD Creator

Without Windows DVD Maker or iDVD on your computer, what would you do to burn VOB to DVD? What kind of DVD burning software could be used for burning VOB to DVD? Well, make it easy. Leawo DVD Creator could be of great help for you. It is a professional 3rd-party VOB to DVD converter that enables you to import VOB files (with no need of converting VOB files), add and edit disc menu, and burn VOB to DVD disc, folder and/or ISO image file freely.

1. Support 180+ video formats, including: AVI, MP4, MKV, FLV, WMV, MOV, 3GP, MTS, M2TS, F4V, etc.
2. Preset disc menu templates. Allow you to edit disc menu as you like.
3. Edit video files to change video effect and apply 3D effect freely.
4. Burned DVD movies could be played on any DVD player freely.


Download and install this VOB to DVD Converter on your computer.

1. Launch this VOB to DVD converter. Click "Add Video" button to browse and add source VOB files for loading.
2. (Optional) Add disc menu to output DVD by selecting one on the right sidebar. You could get instant preview and edit selected disc menu.


3. Click the big green "Burn" button. On the popup sidebar, set Burn to, Disc Label and Save to options.
4. Start to burn VOB to DVD by clicking the bottom "Burn" button. This VOB to DVD burner would get started instantly.

Conclusion

The basic information about VOB files may help you know where it comes from and why it exists. With that, the extension of burn VOB to DVD freeware is necessary because it needs some special codec. WinX DVD Author is one of the free software to burn VOB files to DVD, yet it is lack of so many great features. The best DVD burning program here is Leawo DVD Creator that you can see the comparison table easily

Rip DVD to Apple TV on Mac


To play DVD on Apple TV uninterruptedly, you need to rip DVD to Apple TV, and the DVD ripping process requires a DVD to Apple TV converter. You may find it difficult to find a suitable DVD to Apple TV converter, but you are lucky to come across this article as I am to introduce 2 different DVD to Apple TV converters and the respective way to play DVD on Apple TV.

Rip DVD to Apple TV Using Leawo DVD Ripper


Step 1: Load Source DVD File

Launch the DVD to Apple TV converter, click "Add Blu-ray/DVD" button to load source DVD movies.


Step2: Set output settings
Click the drop-down box on the left side of the big "Convert" button and then select the "Change" option to enter "Profile" frame and choose the desired video format from the "Format" section. You could select MOV/MP4 from "Format" group, or "Apple TV "directly from "Device" group.


Optional settings: Click "Edit" button on the drop-down box to adjust Video Codec, Audio Codec, Bit Rate, Video Resolution, Frame Rate, Sample Rate, Aspect Ratio, and Audio Channel.
Step 3: Start converting

Return to the main interface and then click the green "Convert" button on the sub-menu bar to call out a sidebar, where you need to set output directory and click the bottom "Convert" button at the bottom to start DVD to Apple TV conversion.


Step 4: Connect the Apple TV with your Mac

Open the "System Preferences" of your Mac computer, and click on the "Displays". Then you can open the Airplay. Change the "Airplay Mirroring" from "Off" to "Office Apple TV", and it will connect automatically. A couple of seconds later, your Mac and widescreen TV will be connected. After that, the converted DVD movies would then be streamed to your widescreen Apple TV once it's played on your Mac.

It does not matter what converter and what method you are using, but it does matter that you successfully achieve the aim of playing a DVD on Apple TV. Please have fun watching DVD movies on the large screen of HDTV!

Rip DVD to Apple TV Using Aimersoft DVD Ripper


Step 1: Load Source DVD File


Click "Load DVD" or "File" > "Load DVD folder" to choose your DVD-ROM in the pop-up window and click the "OK" button to import the files. As you can see, you can either convert the whole DVD or just choose the chapters you want to convert.
Step 2: Select Subtitles, Audio Tracks and Output Format


Normally, DVD movies have several subtitles like English, Chinese, French, Japanese, and so on. You can click "Subtitle" to choose the one you need or select "No Subtitle". For the audio tracks, simply click "Audio Track" and select the one you want. After that, click "Profile" and choose "Apple TV" as the output file format from the drop-download format list for your Apple TV.
Step 3: Start converting

Finally, click the "Start" button to rip DVD to Apple TV. In a few minutes, you will get the converted movies. And then, just use iTunes to stream the files to Apple TV and enjoy them!

How to Rip DVD with VLC

How to convert DVD to MP4 using VLC

Suppose many of you do not have an idea about how to convert DVD to MP4 using VLC, let alone those even do not know VLC as a media converter, you can follow this guide to learn to convert DVD with VLC.
Step 1: Make sure VLC is installed on your PC correctly.
If you do not have one, go online, download the installation package and install it on your computer. The installation package of VLC can be found on a lot of different websites. Launch the media player after installation is complete.
Step 2: Insert the DVD disc to the PC.
Open your DVD tray and insert the DVD to the computer.
Step 3: Open disc on VLC.
Click Media > Open Disc to enter the Open Media page.

Step 4: Choose the disc to convert.
Under the Open Media page, tick DVD under Disc Selection, and tick No disc menus.


Step 5: Convert DVD to MP4 with VLC.
Click Play and choose Convert from the drop down menu, which will lead to a page for setting the output format from the Profile box. After MP4 is chosen, click Start and you will need to specify the directory to save the output MP4 files before the process really takes place. Then the conversion from DVD MP4 with VLC starts immediately.

How to use Leawo DVD Ripper to convert DVD to MP4

To convert DVD to MP4, VLC is not your only choice considering that there are a lot of excellent DVD rippers and converters out there. Here is a good choice for you. Leawo DVD Ripper is a program within the suite Prof. Media, which is developed by a professional media processing team, Leawo.

This program is fully capable of ripping and converting DVD disc, folder, and ISO image file to any other common formats for streaming on media player and software. It provides 6X speed in terms of media processing and is able to remove any preset CSS protection or region code without quality loss. It supports a wide range of output videos. Common video formats like MP4, MKV, AVI and more are all supported, you can easily have the DVD ripped and play DVD on Apple TV, iPad, Android tablets, etc. You can also use it to convert DVD to FLAC, MP3 and other audio files if you need. Let's take a close look at the tutorial guide here to convert DVD to MP4.
   
Step 1: Install Leawo DVD Ripper.
Click the button above to download and install the program to your drive. This won't take long so you can wait till it is done and launch the program immediately. Aforementioned, this program is within the Prof. Media so you can click on the ripper icon on the home interface to enter the DVD ripper page.

Step 2: Add the source DVD here.
Click Add Blu-ray/DVD to add the source DVD disc to the program. Note that if you've already converted the disc to an ISO image file or disc folder, click on respective option to import the files to the program.

Step 3: Choose the mode to rip and convert the disc.
Once you decide where to import the DVD file, choose the mode to rip and convert the file. Full movie means to convert the whole disc, main movie for the main movie only, and custom mode for selected parts to convert. Click OK to proceed when the mode is selected.
Step 4: Change the output format to MP4.
Click Change from the format drop-down menu and choose MP4 as the output format from the Profile panel. Unlike converting DVD to MP4 with VLC, Leawo DVD Ripper provides more output formats and specific devices for users to choose.
Step 5: Edit the video and audio parameters.
Click Edit from the format drop down menu, and you can set video and audio parameters based on your requirements. This will allow you to adjust the output MP4 parameters such as codec, bit rate, aspect ratio and so on. Alternatively, you can click on the editing icon next to the file to do some editing to the video, for example, trim, crop, add 3D effects, and the like. Likewise, you can also remove 3D effects if necessary.
Step 6: Convert DVD to MP4.
Click Convert from the toolbar and you will be navigated to a sidebar, requesting you to set a directory path for saving the output MP4 file. Then, click Convert at the sidebar bottom to start the process immediately. Your DVD to MP4 file will be ready for playback once this process completes successfully.

Conclusion

To draw a conclusion on what we have introduced in this post, we have to understand that for various reasons, converting DVD to MP4 is becoming a trend these days. Finding a proper program to do the job is important so we introduce VLC and Leawo DVD Ripper respectively, both of which have expertise in media processing. Hence we give readers a brief tutorial guide to convert DVD with VLC and Leawo DVD Ripper for better understanding of these two programs.

 Later we draw an unflattering comparison between the two programs, and we learn that VLC is not able to process files in batches while Leawo DVD Ripper stands out thanks to its capability to process files in batches, offer 6X faster speed, out put 100% file quality, and give user friendly interface for both beginners and experienced users. With regards to program stability, VLC is less competitive as this is an pen source, which is run with the help of user donations.

Unlike VLC, Leawo DVD Ripper is sorely own and run by Leawo, a leading media processing developer. All in all, if you are new to media processing, I suggest you use Leawo DVD Ripper. It will optimize your user experience and turn you into a regular user for this program. Leave your comments here once you have tried the program.

3 Best DVD Ripper for Mac OS X

Part 1: Top 3 Best DVD Rippers for Mac

No. 1 Best DVD Ripper for Mac: Leawo DVD Ripper for Mac

Leawo DVD Ripper for Mac is Leawo Software’s featured Mac DVD ripping program. Having a simple and user-friendly interface, Leawo DVD Ripper for Mac like its Windows counterpart is extremely easy to operate. There is no professional expertise erquired to ultilize the best Mac DVD ripper, which means even software greenhands may find it friendly to decrypt and convert DVDs. After entering the main interface, users can import DVD disc and DVD folder as input. 

Leawo DVD Ripper – the best Mac DVD ripper is also preset with a variety of popular output devices like Apple devices iPhone 6/6s (Plus), iPad Air, iPod Touch, Apple TV and so on, Android devices Samsung Galaxy Series, HTC Smartphone and so on, and Microsoft products, etc. For advanced users, they can detail video and audio parameters such as Video and Audio Quality(Best/Normal/Low), Video and Audio Codec, Bit Rate, Resolution, Sample Rate, Frame Rate, Aspect Ratio and Channel by virtue of Leawo DVD Ripper for Mac. What’s even more amazing is that users can trim DVD video length, crop DVD video size, adjust DVD video effect, add watermark upon DVD video, and convert 2D source DVD video into 3D movie with the best Mac DVD ripper’s internal DVD editor.


No. 2 Best DVD Ripper for Mac: MacX DVD Ripper Pro

MacX DVD Ripper Pro is another best Mac DVD Ripper ranking just behind Leawo DVD Ripper for Mac. Like Leawo DVD Ripper for Mac, MacX DVD Ripper Pro provides a professional solution to rip and backup DVD on Mac to many preset profiles like MP4, MOV, FLV, MP3, etc. Its supported input formats also include encrypted DVDs. It has many functions that Leawo DVD Ripper for Mac possesses: for example, detailed video and audio parameters adjustable, DVD trimming, cropping, and merging available, screen snapshot accessible, etc.

However, it cannot output 3D movies and it charges a higher price than Leawo DVD Ripper for Mac. With MacX DVD Ripper Pro in hand, users can decrypt and rip any DVDs to various video and audio formats playable on iPhone SE, iPhone 6/6s Plus, Apple TV, iPad Air, iPod Touch, etc. for on-the-go enjoyment. The second best Mac DVD ripper also has a Windows version called WinX DVD Ripper.

No. 3 Best DVD Ripper for Mac: HandBrake

HandBrake is an open-source, multiplatform video transcoder available for MacOS X, Linux, and Windows. It can input common DVD and Blu-ray source and output only MKV and MP4 video formats. It supports iPhone, iPod, PSP, Apple TV, PS3 as output devices. However, HandBrake alone cannot decrypt and copy-protected or commercial DVDs.

To rip commercial DVDs, it needs the help of third-party software, VLC media player. HandBrake is a totally free DVD Ripper for Mac, Windows, and Linux, but it is very unstable, and sometimes will crash, bringing much inconvenience to its users. Therefore, HandBrake alternative No. 1 best DVD ripper Mac – Leawo DVD Ripper for Mac is highly recommended.

Part 2: How to rip DVD on Mac with No. 1 Best DVD Ripper for Mac

Download and intall the top DVD Ripper for Mac – Leawo DVD Ripper for Mac, and then follow the step-by-step tutorial guide to kick off the process of ripping DVD.

Step 1: Import source DVD
Insert DVD disk into Mac’s DVD drive, and click “Add Blu-ray/DVD” button to import source DVD.


Step 2: Choose output format
Click the drop-down box (named “MP4 Video” by default), and choose “Change” to select output format.


Step 3: Set output directory and Start to convert
Back to the main interface and click the big green “Convert” button. There would pop up a sidebar with “Save to” option. Set output directory and other settings as you like. Then click the bottom “Convert” button to start to convert DVD on Mac.


Friday, May 29, 2020

How to Rip Blu-ray for Plex

Plex Media Server (abbreviated as Plex) is a handy media server, able to play media files from various sources. For example, you can add folders and files already on your computer, or you can stream programming through various channels that come with the service, including Apple Movie Trailers, The Colbert Report, Live Music Archive, PBS, Pitchfork TV, Plex Podcast, SoundCloud, and more. With Plex Media Server, you can even easily play Blu-ray movies without any quality data losses. Here, let’s see how to rip Blu-ray to Plex for backup or playback.


To play Blu-ray files on Plex media server, you have more than one way to go. Here, you can directly use Plex Media Server and another Plex Client playback software. Or you have another easier way like using a professional Blu-ray ripper, so as to freely play the converter Blu-ray files on Plex or just back it up. Now, let’s see these five different ways one by one.

Part 1: Rip Blu-ray for Plex using Blu-ray Ripper

Here, you can rely on this almighty Leawo Blu-Ray Ripper, which allows you to easily rip Blu-ray and convert it to any other digital file formats that can be supported by Plex. Various file formats can be supported including MKV, MP4, MPEG, AVI, FLV, RMVB and etc. Moreover, the editing features within this software allows you to easily customize the output file by adjusting the detailed settings of output file such as resolution, frame rate and many more. And the converted files can be played on various different platforms including Plex Media Server, computers, Apple devices, Android devices, and other mobile devices. Best of all, this professional software has a simple user interface, enabling even computer novices to rip Blu-ray files within a few simple clicks.

Step 1. Open the software & Load source file
First of all, open the installed software on the computer and then click on the Convert option on the top panel to reach the main interface of Leawo Blu-ray Ripper. Then hit the Add Blu-ray/DVD option to load the wanted source file.


Step 2. Set the output file format
Now, click on the the HD MKV Video option, enter the Change section and then go to Format tab to continue. Under the Format tab, select the wanted output file format as wished and liked.


Step 3. Customize settings of output file
Hit the pencil-shaped icon on the top right corner of the selected box. You will then see the below interface and then just set the codec, channel and more settings as liked. After that, remember to hit the OK option to save these settings.

Step 4.Start ripping Blu-ray for Plex
Now, hit the green icon of Convert to go on, specify the output file location and then click on the Convert icon at the bottom to start the process.

The only thing you need to do now is wait patiently for the process to get completed within a little while. After that, you are free to play Blu-ray on Plex that has been converted. By the way, the converted Blu-ray files will be saved on the computer by default, so you can actually save such quality lossless files on the computer as a backup! So if this is what you are looking for, just stop hesitating. Have a try of this powerful Leawo Blu-ray Ripper and it surely won’t let you down!

Part 2: Rip Blu-ray for Plex via MakeMKV

To rip Blu-ray for Plex, MakeMKV is a good choice. MakeMKV converts the video clips from proprietary disc into a set of MKV files, preserving most information needed. What is more, MakeMKV can instantly stream decrypted video without intermediate conversion to wide range of players, therefore, you are able to watch Blu-ray discs with your favorite Plex Media Server. Below we will show you a quick tutorial on how to rip Blu-ray discs for free using MakeMKV.
Step 1. Place your Blu-ray disc into the drive and launch MakeMKV, which will last for a few seconds. Once it is over, click the big, animated Blu-ray drive button to read that disc's contents.


Step 2. The disc's titles (video files) and their accompanying audio and subtitle tracks will be shown in the interface.You can right-click any of the checkboxes and select "Unselect All" to clear out the clutter, pick the titles or any subtitle tracks as you wish.
Step 3. After all the parameter settings, it is time to choose an output folder. For save more time, a local hard drive is preferred.
Step 4. Hit "MakeMKV" option, then later you will have a jumbo-sized MKV file for each title you selected.
MKV files can easily play multiple audio and subtitle tracks, and don't need to burn in subtitles. That makes MKV a more powerful, flexible format.

How to Play ISO File on VLC?

Blu-ray disc allows us to enjoy home theater-like experience with greatest sound and image effects ever. All is fantastic except that blu-ray disc is not cheap and it takes lots of space. That is not a problem anymore as many users will consider to backup their blu-ray disc as an ISO image file on their PC, which helps save space, cuts down costs, and lets users to burn ISO image file to blu-ray disc if necessary.

Technically, users can use certain video players to play ISO files directly without bothering to burn them to blu-ray disc for movie enjoyment, such as VLC player. In this post, we will not only talk about playing ISO file using VLC player but also go deeper to introduce a few video players for you to play ISO files.

Introduction to VLC player

if you have dealt with an ISO file ever, VLC player may be a familiar name to you because VLC player can play ISO files directly. VLC media player, often called VLC, is a free and open-source, portable, cross-platform media player and streaming media server. It is compatible with desktop operating systems and mobile platforms, such as Android, iOS, Tizen, Windows 10 Mobile and Windows Phone. It also supports digital distribution platforms like Apple App Store and Microsoft Store.


VLC is best known for its strong and powerful features, which supports many audio and video compression methods and file formats, including DVD-Video, video CD and streaming protocols. Moreover, it is able to stream media over computer networks and to transcode multimedia files. All these features make VLC the most popular and versatile media player ever.

Can VLC play Blu-ray ISO and how

Basically the answer is yes and I will show you how to make VLC play ISO step by step. First and the most importantly, you should have a VLC player installed properly on your PC. If you don't have one, click here to get one free. Note that you'd better get the latest version of VLC as VLC official site claims that the 2.0 and later version support Blu-ray media playback with some extra operations. Next, I will divide this section into two minor parts to introduce how to play blu-ray ISO on VLC efficiently and professionally. We can either mount the blu-ray ISO file to VLC or convert blu-ray ISO to a universally compatible video format for playback on various media players.
Mount the Blu-ray ISO file to play with VLC
Simply put, if you know where your ISO file is stored, just drag it to the VLC player and enjoy the playback. However, for most users, the easiest way is to launch VLC first, and click Media > Open File to locate what you want to stream.

If you run the ISO file as a virtual drive, you can mount the ISO file before playback is available. You can right click the ISO file and choose to open with disk. Click Mount to mount the image in the readable disk format. Then, open VLC Media Player. Instead of directly opening an ISO file, here you can select File > Advanced Open File > Disc tab. In the Disc tab, choose the Video_TS folder on this image and click Open. Your blu-ray ISO will be played on VLC successfully.

 Convert Blu-ray ISO to a common video with Leawo Blu-ray Ripper to play with VLC
Many users also complain that they usually encounter problems during the ISO playback on VLC, and to be honest, we can have a better way to settle this. We can convert blu-ray ISO to a universal format and then stream it on VLC trouble free.
Leawo Blu-ray Ripper is one of the best known blu-ray rippers in the world, being able to handle both blu-ray and DVD conversion. It supports to rip and convert Blu-ray/DVD to MP4, Blu-ray/DVD to MKV, Blu-ray/DVD to AVI, Blu-ray/DVD to WMV, etc., and extract audio off Blu-ray/DVD to save in MP3, AAC, FLAC, etc. 4K video, 1080P video, 720P video and regular video are available on output and more than 180 formats are provided. In this case, we can rip blu-ray ISO to a common video with this software before we stream the video on VLC.

Step 1: Launch Leawo Blu-ray Ripper.
Open Leawo Prof.Media(the program which Leawo Blu-ray Ripper is included in) and click Blu-ray Ripper to open it on your computer.


Step 2: Add ISO file to the software.
You can click Add Blu-ray/DVD > Add ISO file to import the source file here.


Step 3: Select titles in the disc to convert
The following interface will list all the video titles packed inside the ISO file and you will have to choose which titles you need and want to convert to video. There are 3 buttons on top of the video title list. The Full Movie button will help you select all the video titles for conversion. Main Movie will select the longest video by default. And Custom Mode enables you to select the titles you need manually from the title list. Click OK after selecting the needed video titles so they can be added to another video list for further settings.


Step 4: Change output format.
Choose the output format drop down box which locates on the left side of the green Convert button and click Change. Here we can select a lot of different output formats to convert the videos into. And most of the provided formats are compatible with VLC. Here you can go for MP4 to convert the Blu-ray to MP4 so that you can play the Blu-ray movie on PS3, iPhone, iPad and other devices if you want.


Step 5: Convert the blu-ray ISO to MP4.
Click Convert on the toolbar right and you will be asked to set an output directory, after which hit the round button Convert to start the conversion process.

Monday, May 18, 2020

How to Convert DVD to YouTube

As is well known to us all that YouTube has become the world's No. 1 online videos watching site. Apart from watching online videos on YouTube, YouTube users are also allowed to upload videos to YouTube for sharing with family and friends. Many YouTube users have the habit of collecting DVD disks and would like to upload DVD to YouTube for sharing with far-away friends.

However, when users are trying to upload DVD to YouTube, they may get into trouble since YouTube doesn't support DVD uploading. Then how to upload DVD to YouTube? Obviously, users have to convert DVD to YouTube friendly video formats before uploading DVD to YouTube.

Best DVD to YouTube Converter -- Leawo DVD Ripper


Leawo DVD Ripper Dubbed as the best DVD to YouTube converter, Leawo DVD Ripper is highly praised for its outstanding features in ripping DVD to various video formats. If you have problem in selecting the right DVD to YouTube converter, please take a look at Leawo DVD Ripper's key features before you make any decision.

As a professional DVD ripping application, Leawo DVD Ripper could convert DVD to video and audio in 180+ formats including the formats supported by YouTube. In addition, it allows users to adjust output video and audio parameters like video codec, audio codec, video size, bit rate, aspect ratio, frame rate, etc.

The built-in video editor allows you to edit DVD movies freely. You can trim video length, crop DVD video size, adjust brightness, contrast, saturation and volume to reset video effect, and add image or text watermark as signature.

How to Convert DVD to YouTube

With Leawo DVD Ripper prepared, you can start to convert DVD to YouTube.The process of uploading a DVD to YouTube can be divided into two parts. First we have to convert DVD to YouTube video, and then we can upload the video to YouTube.
In this part, we focus on how to convert DVD to YouTube video with Leawo DVD Ripper.

Locate source DVD

With Leawo DVD Ripper running on, insert DVD disk into computer's DVD drive and click “Add Blu-ray/DVD” button to load source DVD into the best DVD to YouTube converter software, or you can directly drag-and-drop source DVD file into the program. For your information, DVD folder can also be imported for conversion.

Choose output format

After the loading of source DVD file, click the drop-down box (named “MP4 Video” by default), and choose “Change” to select output format supported by YouTube like MP4, FLV, MOV, AVI etc. Note: If your target format is MP4, the same as the one by default, you don't need to change the output format, but if your target format is not MP4, you need to pick up the target format in the “Profile” panel.

Adjust detailed settings

After setting output profile, you can reopen the drop-down list and then select “Edit” option to enter the Profile Settings panel. On the Profile Settings panel you can reset parameters including: Video Codec, Quality, Resolution, Bit Rate, Frame Rate, Aspect Ratio(YouTube uses 16:9 aspect ratio players), Audio Codec, Audio Quality, Bit Rate, Sample Rate, Channels, etc. After adjusting, click “OK” to quit the Profile Settings panel.

Start to convert

Click the big green “Convert” button on the top-right of the interface to rip DVD to YouTube video.

How to Upload DVD to YouTube

After ripping DVD to YouTube video, we can now begin the second major step of uploading DVD to YouTube to upload the converted video to YouTube.

You must first sign up for a free YouTube membership to upload videos, then click "Upload Videos" in the upper-right-hand corner of any YouTube page. Enter as much information about your video as possible, including Title, Description, Tags, and Category. Then all the things left is following its instructions.

If you still don't understand the video uploading process, follow the instructions below excerpting from YouTube official website:

1. Sign into your YouTube account.
2. Click on "Upload" at the top of the page.
3. Before you start uploading the video you can choose the video privacy settings.
4. Select the video you'd like to upload from your computer. You can also create a video slideshow or import a video from Google Photos.
5. As the video is uploading you can edit both the basic information and the advanced settings of the video, and decide if you want to notify subscribers (if you uncheck this option no communication will be shared with your subscribers). Partners will also be able to adjust their Monetization settings.
6. Click "Publish" to finish uploading a public video to YouTube. If you set the video privacy setting to "Private" or "Unlisted", just click "Done" to finish the upload or click "Share" to privately share your video.
7. If you haven’t clicked Publish, your video won’t be viewable by other people. You can always publish your video at a later time in your Video Manager.

Once the upload is completed we will send you an email to notify you that your video is done uploading and processing. You can then forward that email to friends or family for easy sharing. If you prefer not to receive notification, you can opt out by visiting your email settings.