Sunday, January 19, 2020

Best Way to Burn Photos to A Disc

Leawo DVD Creator is an all-inclusive combo program that is designed to burn videos and photos in over 180 formats to DVD movies quickly and easily. It supports almost all the common video formats including MP4, AVI, MKV, FLV, MOV, etc. and photo formats like PNG, BMP, JPG and JPEG. It enables you to burn DVD disc, folder and ISO image file as you like in BD50, BD25, DVD5 or DVD9. Additionally, it has dozens of preset menu templates available for you to apply.

 If you want to design your own special menus, it has a built-in menu designer for creating DVD menus by yourself, with which you could add background music, image, and video, change the title, adjust text color, size, font, etc. Moreover, it has a user-friendly interface so that anyone with no technical background can use this DVD creator to create a photo slideshow and burn them to disc with ease.
You could download and install it on your PC, insert a black disc into the CD-ROM and then follow the forthcoming guide on how to burn photos to a disc easily without any quality loss.
             
Step 1: After installing the program, you will find that DVD creator is one of the powerful programs that compose of Leawo Prof. Media. Now you can launch Leawo Prof. Media, click the Blu-ray/DVD Creator tab to enter the DVD creator module.

Step 2: Click the “Add Photo” button to import photos or photo folders to the program. All the loaded photos would generate a photo slideshow video. You can click the edit button to enter the video section to customize the photo slideshow video.


Step 3: In the Video section, you can add more photos to the slideshow video, or move your mouse onto a photo and then you can rotate the photo or remove the photo from the video. Besides, it enables you to set the output video effect, including photo duration, transition duration, and transition effect settings.


Step 4: Enter the Audio Section, click Add Music button to add your favorite songs from your computer to the program as the background music of the slideshow video. And then, you can also import more songs, delete unwanted songs, and set the sound effect of Fade in, Fade out or Loop play.

Step 5: When all the slideshow video settings are finished, you go back to the main interface where you can burn to BD-50, BD-25, DVD-9 or DVD-5, choose the aspect ratio of the video between 4:3 and 16:9, and set quality to “Fit disc” to fit the video best. And then you click the green Burn button to pop up a sidebar where you can rename the disc label and choose an output destination path to save the burned video. Finally, click the Burn button on the sidebar to start burning and finish the process very soon.


Tuesday, January 7, 2020

What are the Best Blu-ray to Digital Formats?


Part 1: What are the Best Blu-ray to Digital Formats?

Speaking of digital formats, here I’ve listed several types of the top popular ones for your inference:
  1. AVI – Audio Video Interleave. Developed by Microsoft, the AVI format is one of the oldest video formats. However, it is also a top popular digital video file format. Generally speaking, Microsoft devices support the AVI file format.
  2. FLV – Flash Video Format.  Videos in the FLV format remain in high quality even after compression to smaller file sizes, which means that the videos on the Web load quickly and won’t spend a lot of time using up bandwidth. Generally speaking, FLV file format is most used for online videos like YouTube videos.
  3. MP4 – Moving Pictures Expert Group 4. MP4 is an abbreviated term for MPEG-4 Part 14. The MP4 file format is also another great file sharing format for the Web, MP4 file sizes are relatively small but the quality remains high even after compression. By far, MP4 is the most popular video file format that could be recognized and accepted by almost all media players and devices.
  4. MKV - The Matroska Multimedia Container is a free, open standard container format, a file format that can hold an unlimited number of video, audio, picture, or subtitle tracks in one file. It is a universal format for storing common multimedia content, like movies or TV shows. Matroska is similar in concept to other containers like AVI, MP4, or Advanced Systems Format (ASF), but is entirely open in specification, with implementations consisting mostly of open-source software.
  5. MOV - A MOV file is a common multimedia container file format developed by Apple and compatible with both Macintosh and Windows platforms. It may contain multiple tracks that store different types of media data and is often used for saving movies and other video files. MOV files commonly use the MPEG-4 codec for compression. MOV files may contain video, audio, time code, and text tracks, which can be used to store and synchronize different types of media.
There are also many other popular digital formats such as M4V, WMV, MPEG, WebM and so on. Okay, now you possibly can’t wait to convert Blu-ray to digital formats. Check the below content to learn how to convert Blu-ray to digital files with different Blu-ray to digital video converter tools.

Part 2: Best Way to Convert Blu-ray to Digital- Leawo Blu-ray Ripper

Leawo Blu-ray Ripper is a professional Blu-ray/DVD ripper and is able to convert Blu-ray or DVD file to any common or uncommon digital format, which fully ensures smooth playback on mobile devices as well as on laptops. This handy assistant has a wide range compatibility of file formats, such as MKV, MP4, MPEG, AVI, FLV, RMVB and many more. All in all, almost all digital formats can be perfectly supported by this software. In addition, the editing feature within this software enables users to freely customize the output file format including details. To put it simply, with this software, you can freely adjust settings of the output file including resolution, frame rate and etc, so as to enjoy the movie or video playback as liked. Most importantly, though powerful and practical functions as this program gets, it has an incredibly easy to use interface.    
Download and install Leawo Blu-ray Ripper on your computer (Note: It’s a module of Leawo Prof. Media). Below is the step by step user guide:
The below steps would show you how to rip and convert Insanity Workout DVDs to videos in various formats with Leawo DVD Ripper. Firstly, download and install it on your computer.
   
Step 1: First of all, open the installed software and open it. Then hit the Convert option to continue the process. Then click on the Add Blu-ray/DVD option to load source Blu-ray file to the main interface of this program as shown in the below picture.

Step 2: Then, click on the clickable button next to the “Add Photo” button, and then on the drop-down panel hit the “Change” option. You now come to the Profile panel, where you need to select a digital file format from either “Format” or “Device” group as output format.

Step 3: After setting output format, you could also click the “Edit” option on the drop-down panel to adjust parameters of selected digital profile. You can then change the settings like video codec, channel, resolution and many more to your own preference. Once finished, hit the OK option to save the settings and continue the process.


Step 4: Click on the green icon of “Convert” option, specify an output location and then hit another Convert icon at the bottom to start the conversion.
Finally, just wait patiently for the process to get completed within a little while. Once the process is done, you are free to enjoy the converted files on your mobile device without any restrictions and you can also save them for a longer time without worrying that they may be easily damaged.


Thursday, January 2, 2020

How to Burn iTunes Movie to DVD

Q1: "I have just bought an iMac and have done a short video in iMovie. How do I burn it onto a DVD?"
Q2: "I've just upgraded to iMovie 10 and cannot figure out how to burn my movie to a DVD. What should I do?"

There are so many users that are unclear about how to burn iMovie to DVD that they have to ask for help on some forums or Apple Community. The two typical questions quoted here are the most common problems that hundreds of people have claimed the same confusion. Obviously, such problems always happen no matter for new comers or old hands when burning iMovie to DVD. And you might be one of them who are pursuing the easiest and most efficient way to burn iMovie to DVD so that you could play the movie freely on TV. Actually, it’s not a problem any more with Apple DVD burning software iDVD and top five validated iDVD alternatives offered in this post.

Part 1: Top 5 Alternative Software Programs to Burn iMovie to DVD

Luckily, there are top 5 high-performance and great DVD burning software programs recommended to you when you have no iDVD.

1.Leawo DVD Creator

Leawo DVD Creator is a powerful and easy-to-use iMovie to DVD burner that performs even better than iDVD. It is specially designed to burn iMovie to DVD at high burning speed and the best output quality. In addition to the iMovie files, the program could also burn videos in almost all regular formats like AVI, FLV, MP4, WMV, MOV, MKV, VOB to DVD. Moreover, the built-in video editor and dozens of stylish DVD menu templates allow you to personalize your DVD as you like. Because Leawo DVD Creator supports Windows 7/8//8.1/10/Vista and Mac OS X, anyone using different kinds of operating systems can takes advantage of this burning program to burn iMovie to DVD to play on TV.

2.SimplyBurns

SimplyBurns is an open source, easy-to-use and advanced DVD burning software application with a GUI designed for Mac OS X. It can easily burn movies to DVD in five modes, including Data, Audio, 1:1 Copy, Rip Disc and Burn Image with several clicks.

3.DVD Styler

DVDStyler is a cross-platform and open source DVD burning application. It can be totally free of charge when creating professional-looking DVDs for you on Mac. Besides, it can create and burn DVD video with interactive menus, add multiple subtitle and audio tracks, import images for background and so on. Moreover, because it supports many common video and audio formats, you can feel free to create a DVD for any video files.

4.Roxio Toast Titanium

Roxio Toast Titanium is the leading DVD burner for Mac, which makes burning even better and more personalized. It supports video from anywhere, including your screen, the web or camcorders, etc. With a simple video editor built-in, you can also cut the unwanted segments from video clips. It has a simple-to-use and clear interface but is quite expensive.

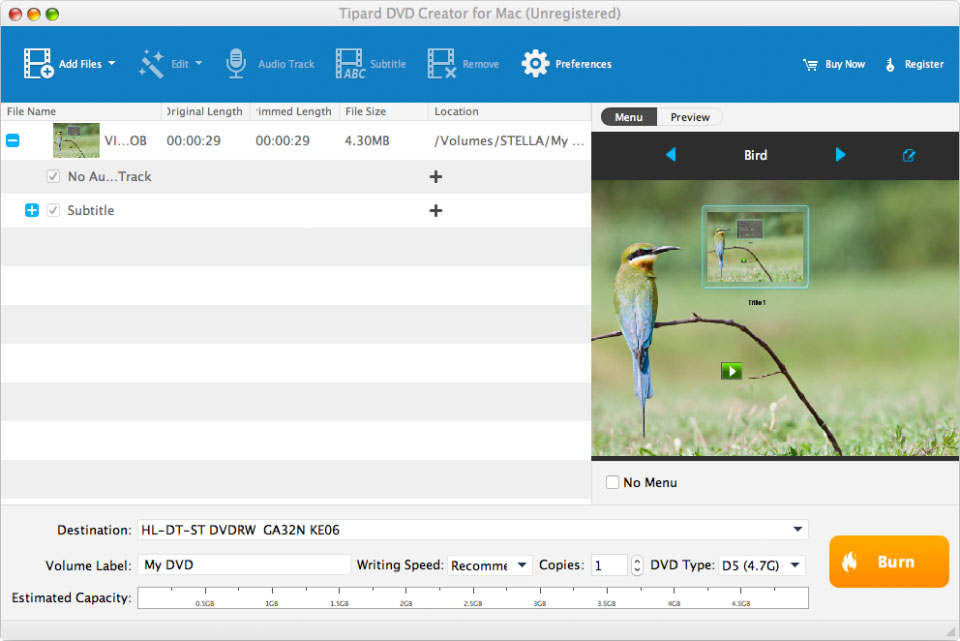
5.Tipard DVD Creator

This is a powerful DVD burning tool which enables you to burn various videos to DVD without watermark. It supports iMovie project and other common video or audio files like MP4, MOV, MKV, AVI, QuickTime HD and more. Besides, it also allows you to customize DVD with its editing functions.

Part 2: How to burn iMovie to DVD on Leawo DVD Creator

Leawo DVD Creator has a user-friendly interface that any of you can master it simply without any technical background. After you download, install and run this iMovie to DVD burner for Mac, then you can burn and convert iMovie to DVD on Mac OS easily. Here come the detailed steps on how to burn iMovie to DVD Mac.
               
Step 1:Import the source iMovie project into the DVD Burner
After entering the main burning interface by selecting Burn tab on the top bar, simply click "Add Video" icon to add your iMovie projects or drag and drop iMovie project to the program. The Mac DVD burner can burn iMovie to DVD disc, folder and ISO image. To burn iMovie project to DVD disc, you are required to insert a blank DVD disc into the recordable Mac DVD-ROM.


After importing, you can rearrange video order, add external subtitles to your iMovie projects, choose to burn to DVD-5 or DVD-9, set aspect ratio and output resolution, preview imported projects with built-in player, and check out the needed space for DVD burning at the bottom of program.
Step 2:Edit iMovie files (Optional)
You can personalize your iMovie projects by clicking edit option to open the internal video editor window where you can crop the frame size, trim video length, append effects, add picture or text watermark, rotate video angle and add 3D effect. If you have no editing needs, just skip this step.

Step 3. Set disc menu template
Select a disc menu template from the right sidebar of the main interface and preview it by clicking its center. Via clicking the pencil icon on the disc menu preview panel, you could edit your DVD menu by adding background picture and music, choosing desired buttons and frames, etc. and save the edited disc menu template for future use.

Step 4. More DVD burning settings
Click on the big green "Burn" button to call out the burning settings panel, where you choose proper burning settings like to burn video to DVD disc, ISO file or/and folder, input volume label, set saving destination for output files.

Note:
1.If you only need to burn iMovie project to DVD disc on Mac, select DVD disc recorder drive as output under the "Burn to" option.
2.You could also burn iMovie to DVD disc, folder and ISO image file at the same time.
3.Make sure your computer hard drive gets enough storage if you want to create DVD folder or ISO image file.

Step 5. Burn iMovie to DVD Mac
After all settings are down, click on the "Burn" button on the window to start burning iMovie to DVD on Mac immediately. When the burning process finishes, you could view the movies in burned DVD disc on any DVD player.

All in all, you can burn iMovie to DVD without a hitch with the help of Leawo DVD Creator and the other four useful DVD burning software applications recommended in this post. Considering the functions, user friendliness, cost and other relative points, Leawo DVD Creator is recognized as the most cost-efficient and reliable DVD burning applications, with which you can easily be an expert in burning iMovie to DVD even if you are a total green hand on how to burn iMovie to DVD before. Feel free to have a try. After all, the act of doing leads to accomplishment.